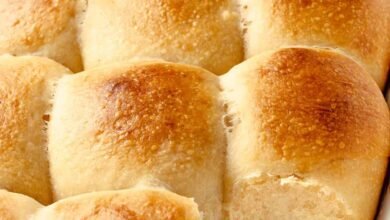
There is nothing quite like the smell of fresh homemade sourdough baking in your kitchen, especially when it is packed with rich roasted garlic and aromatic garden herbs. This sourdough garlic and herb bread recipe is a simple guide to creating a soft, chewy, and deeply flavorful loaf of artisanal bread right in your home oven. The combination of slow fermented sourdough starter, rich olive oil, roasted garlic cloves, and fresh herbs creates an unbelievable blend of tastes and textures. You start with a basic dough made from flour, water, salt, and active sourdough starter, and then you fold in generous amounts of minced garlic, parsley, rosemary, and thyme. As the bread bakes, the crust turns golden and crispy, while the inside stays fluffy, airy, and full of soft savory pockets. It is a fantastic loaf for beginners because the recipe breaks down every single step into easy actions. Whether you are brand new to sourdough baking or have been maintaining a starter for years, this recipe will quickly become a favorite in your household.
People fall in love with this special sourdough recipe because it brings the quality of an expensive Italian bakery directly to your family dinner table. The unique taste of traditional sourdough has a slight natural tang that balances beautifully with the sweet, rich notes of cooked garlic and earthiness of fresh herbs. Standard store bought bread often uses artificial yeast and fast processing, which leaves the loaf feeling heavy, plain, and dry. In contrast, this homemade sourdough undergoes a gentle fermentation process that creates giant air bubbles, a tender crumb, and a complex flavor profile that satisfies all your senses. Every bite offers a light crunch on the outside followed by a warm, buttery, herb infused interior that makes people reach for a second slice every single time. It brings pure comfort and excitement to simple meals, making your home feel cozy and welcoming whenever you make it.
You might wonder when is the best time to prepare this delicious garlic and herb loaf, and the answer is truly anytime you want to share love through food. Baking this loaf is a wonderful emotional experience because it forces you to slow down, pay attention to the dough, and enjoy the calming art of kitchen craftsmanship. It is the perfect recipe to make for a cozy Sunday dinner, a holiday gathering with family, or a warm meal on a chilly evening when you need extra comfort. Beyond the emotional warmth, this bread also offers great fitness and health advantages compared to commercial bakery loaves. The long sourdough fermentation breaks down complex gluten and phytic acid, making the nutrients easier for your body to digest while remaining gentle on your stomach. If you are looking for a healthy homemade side dish that fuels your workouts with clean carbohydrates while pleasing your taste buds, this recipe fits your lifestyle completely.
Ingredients You Will Need
To make one large loaf of sourdough garlic and herb bread, gather the following simple ingredients:
-
Active Sourdough Starter (bubbly and fed): 100 grams (about half a cup)
-
Unbleached Bread Flour: 450 grams (about three and a half cups)
-
Whole Wheat Flour: 50 grams (about less than half a cup)
-
Warm Water (filtered, around 80 degrees Fahrenheit): 350 grams (about one and a half cups)
-
Fine Sea Salt: 10 grams (about two teaspoons)
-
Fresh Garlic Cloves (minced or finely chopped): 6 cloves
-
Extra Virgin Olive Oil: 30 milliliters (about two tablespoons)
-
Fresh Rosemary (finely chopped): 1 tablespoon
-
Fresh Thyme Leaves: 1 tablespoon
-
Fresh Parsley (finely chopped): 2 tablespoons
-
Garlic Powder (optional, for extra depth): 1 teaspoon
Step by Step Method
Step 1: Prepare Your Sourdough Starter
Make sure your sourdough starter is active and ripe before you begin mixing your dough. Feed your starter about four to six hours before baking so it doubles in size, becomes very bubbly, and passes the float test when placed in a cup of water.
Step 2: Mix the Flour and Water
In a large glass or ceramic bowl, combine the unbleached bread flour, whole wheat flour, and warm water. Stir the mixture together with a wooden spoon or a dough whisk until all the dry flour disappears and a shaggy dough forms. Cover the bowl with a damp cloth and let it rest for thirty minutes to auto lyse. This resting period allows the flour to fully absorb the water and start developing natural gluten structures naturally.
Step 3: Add the Starter and Salt
Uncover your bowl and add the one hundred grams of active sourdough starter along with the fine sea salt. Work the starter and salt into the dough by gently squeezing and folding the dough over itself with wet hands for about three to five minutes. You will notice the dough moving from a shaggy texture to a much smoother, cohesive ball. Cover the bowl again with your damp cloth and let it rest for another thirty minutes in a warm spot.
Step 4: Sauté the Garlic and Herbs
While your dough rests, prepare your delicious garlic and herb filling. Heat the two tablespoons of extra virgin olive oil in a small skillet over low heat. Add the minced fresh garlic, chopped rosemary, thyme, parsley, and garlic powder to the skillet. Gently cook everything for two to three minutes until the garlic is soft, fragrant, and lightly golden, making sure not to burn the garlic. Remove the pan from the heat and allow the oil, garlic, and herb mixture to cool down completely to room temperature before adding it to your dough.
Step 5: Perform the First Stretch and Fold Cycle
Uncover the dough bowl for your first set of stretches and folds. Grab one side of the dough with wet hands, pull it upward gently without tearing it, and fold it over the top towards the center. Rotate the bowl ninety degrees and repeat this action for all four sides of the dough. Cover the bowl and let it rest for thirty minutes.
Step 6: Laminate and Add the Garlic Herb Filling
After thirty minutes, lightly mist your kitchen counter with a tiny bit of water. Place the dough onto the wet surface and gently stretch it out into a large thin rectangle using your fingers. Spread the cooled garlic, herb, and olive oil mixture evenly over the entire surface of the stretched dough. Fold the left third of the dough over the middle, then fold the right third over, and roll it up from the bottom like a sleeping bag to trap all the delicious filling inside. Place the filled dough back into your large bowl, cover it, and let it rest for thirty minutes.
Step 7: Complete Additional Sets of Coil Folds
Perform two more sets of gentle stretch and folds or coil folds separated by thirty minutes of rest time. These folding cycles help build strength in your dough while distributing the garlic and herbs evenly throughout the loaf without damaging the delicate air pockets forming inside.
Step 8: Bulk Fermentation
Cover the bowl tightly with plastic wrap or a damp towel and let the dough rise at room temperature. This bulk fermentation period usually takes anywhere from three to five hours depending on the temperature inside your kitchen. Look for the dough to increase in size by about fifty to seventy percent, showing visible air bubbles on top and rounded edges around the sides of the bowl.
Step 9: Shape the Loaf
Turn the risen dough out onto a lightly floured surface. Gently shape the dough into a round boule or an oval batard by tucking the edges underneath and gently pulling the dough towards yourself along the counter to create surface tension. Let the shaped dough rest uncovered on your counter for fifteen minutes. If needed, tighten the shape once more using your bench scraper or hands.
Step 10: Final Cold Proof
Line a bread proofing basket or a medium bowl with a clean cotton kitchen towel and dust it generously with rice flour or bread flour. Carefully lift your shaped loaf and place it upside down into the lined basket. Cover the top with a cloth or place the whole basket inside a plastic bag to prevent it from drying out. Transfer the basket to your refrigerator for a cold fermentation proof lasting between twelve to eighteen hours. This slow cold rest develops that classic sourdough tang and makes the dough much easier to score before baking.
Step 11: Preheat Your Dutch Oven
The next day, place a heavy cast iron Dutch oven with its lid inside your oven. Preheat the oven to 450 degrees Fahrenheit (230 degrees Celsius) for at least forty five to sixty minutes so the pot becomes intensely hot.
Step 12: Score and Bake the Bread
Take your cold loaf out of the refrigerator. Invert the dough onto a piece of parchment paper so the smooth side faces up. Dust the top lightly with a little bit of flour, then use a razor blade or sharp knife to make a smooth deep slice down the center or side of the dough. Carefully remove the preheated Dutch oven from your oven, lower the dough using the edges of the parchment paper into the hot pot, put the lid back on, and return it to the oven immediately.
Step 13: Bake to Golden Perfection
Bake covered with the lid on for twenty five minutes to trap steam, which helps the loaf expand and create a crispy crust. After twenty five minutes, remove the lid, reduce the oven temperature to 410 degrees Fahrenheit (210 degrees Celsius), and bake uncovered for another fifteen to twenty minutes until the crust turns a rich golden brown shade.
Step 14: Cool Completely
Carefully remove the baked loaf from the hot Dutch oven and transfer it to a wire cooling rack. Allow the bread to cool completely for at least two hours before slicing into it. Slicing warm sourdough releases trapped steam and makes the inside gummy, so patience pays off with a perfect airy interior texture.
Why This Recipe Is Special
This sourdough garlic and herb bread stands out because it combines traditional sourdough baking methods with rich savory flavors in a way that is easy for anyone to master. The use of a natural sourdough starter eliminates the need for commercial rapid yeast, giving you a loaf that is easier on your digestive system. Wild yeast and beneficial bacteria break down heavy starches during the long fermentation phase, making the bread lower in net carbs and far less likely to cause spike in blood sugar levels. Additionally, real garlic provides strong antibacterial properties and cardiovascular support, while herbs like rosemary and thyme supply healthy antioxidants that protect your body cells. Beyond all the impressive health advantages, the sheer flavor profile of this loaf is extraordinary. Every slice offers a crunchy outer crust, a soft open crumb structure, and bursts of garlic infused olive oil that melt in your mouth.
Extra Tips for Better Taste
-
Use fresh garlic and real herbs instead of dried seasonings because fresh ingredients release natural aromatic oils that elevate the entire loaf.
-
Roast a whole head of garlic in the oven beforehand if you prefer a sweeter, milder garlic taste rather than a sharp punchy flavor.
-
Dust your proofing basket with rice flour because rice flour contains no gluten and prevents sticky dough from clinging to your towel.
-
Add a half cup of shredded parmesan cheese or sharp cheddar along with the herb mixture if you want an extra cheesy savory twist.
-
Brush the outer top crust with warm melted garlic butter right after removing the loaf from the oven for a shiny, extra decadent finish.
-
Store leftovers wrapped in a clean linen towel or paper bag at room temperature for up to three days, or slice and freeze for long term storage.
Final Thoughts
Baking your own sourdough garlic and herb bread at home is a deeply rewarding experience that turns basic pantry items into something truly extraordinary. It brings warmth to your home, fills your kitchen with unmatched scents, and provides wholesome nourishment for the people you care about most. Do not worry if your first attempt is not visually flawless, because every single loaf you bake will teach you something new about dough handling and temperature control. Share your fresh loaf with friends, serve it with your favorite pasta dishes, or simply enjoy a thick slice slathered with salted butter. Enjoy every single moment of the process, from feeding your active starter to enjoying that very first crispy slice.
Nutrition Details
Here is the estimated nutritional breakdown for this homemade sourdough garlic and herb bread recipe based on twelve equal slices per loaf:
Recipe Overview
-
Total Preparation Time: 24 Hours (includes active prep and overnight cold fermentation)
-
Total Baking Time: 45 Minutes
-
Total Yield: 1 Large Loaf (12 Servings)
Nutritional Profile Per Serving (1 Slice)
| Nutrient | Amount Per Serving | Daily Percentage Value |
| Calories | 175 kcal | 9% |
| Total Fat | 3.5 grams | 5% |
| Saturated Fat | 0.5 grams | 3% |
| Trans Fat | 0 grams | 0% |
| Cholesterol | 0 milligrams | 0% |
| Sodium | 320 milligrams | 14% |
| Total Carbohydrates | 30 grams | 11% |
| Dietary Fiber | 2 grams | 8% |
| Total Sugars | 0.5 grams | 1% |
| Protein | 5 grams | 10% |
| Calcium | 15 milligrams | 2% |
| Iron | 1.8 milligrams | 10% |
| Potassium | 75 milligrams | 2% |
Disclaimer
The nutritional information and health suggestions provided in this article are meant for general educational purposes only and should not replace professional medical advice. Everyone’s body, metabolic rate, and dietary needs are completely different, meaning individual health outcomes and nutritional results may vary from person to person. If you have severe gluten sensitivities, celiac disease, or specific health conditions, please consult with a qualified doctor or registered dietitian before introducing sourdough products into your daily routine.