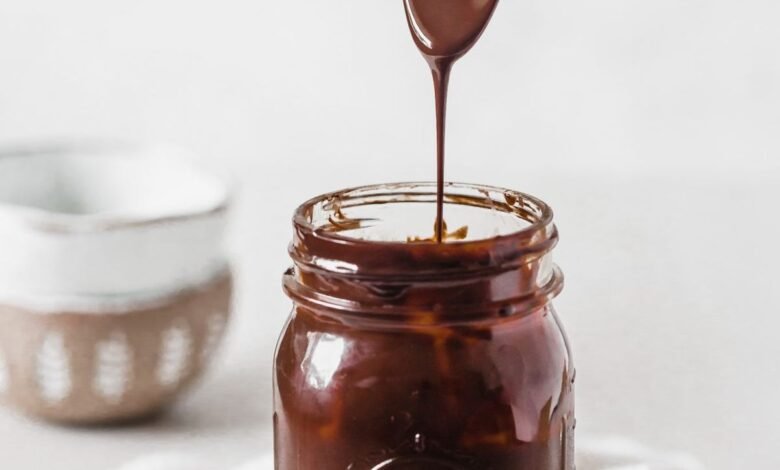
Welcome to the wonderful world of homemade syrups where simple kitchen magic happens right on your stove top. Today we are exploring a breathtaking recipe for canning chocolate syrup that relies on just three basic ingredients you probably already have sitting in your pantry. This recipe takes rich cocoa powder, sweet granulated sugar, and pure water to create a velvety dark syrup that rivals any premium brand you can buy in a grocery store. Many people assume that making and canning your own dessert toppings requires advanced culinary skills or specialty equipment, but that is far from the truth. By following this simple guide, you will learn how to combine these three humble components into a glossy chocolate sauce that can be preserved for long term storage in mason jars. Imagine opening your pantry shelf months from now and pulling out a jar of deeply satisfying, smooth chocolate sauce that you made completely from scratch with your own hands. It is an amazing way to take control of your food supply, reduce plastic waste from store bought squeeze bottles, and enjoy authentic chocolate flavor whenever a sweet craving hits your family.
People absolutely love this three ingredient preserved chocolate sauce for so many practical and comforting reasons. First and foremost, the flavor profile is remarkably clean and powerful compared to commercial syrups that are usually loaded with high fructose corn syrup, artificial preservatives, synthetic dyes, and chemical thickeners. When you take your first spoon of this homemade creation, you taste true dark cocoa balanced perfectly with natural sweetness rather than a sugary chemical mixture. Home cooks also adore how budget friendly this recipe is, as buying cocoa powder and sugar in bulk costs a fraction of buying ready made chocolate squeeze bottles at the store every few weeks. Busy parents appreciate having a batch of shelf stable syrup ready in the pantry for quick glass preparation when children ask for chocolate milk after school or ice cream sundaes on weekend movie nights. It brings a sense of pure nostalgic satisfaction to serve a treat that is free from weird chemical additives while keeping your grocery bills low and your pantry well stocked.
There are countless ideal moments to prepare this comforting sauce, whether you are driven by emotional warmth, incredible taste cravings, or smart fitness goals. Emotionally, stirring a warm pot of rich cocoa on a cold rainy afternoon creates a cozy atmosphere in your home that fills every room with a rich, inviting chocolate aroma. It is a wonderful weekend project to undertake with children or grandchildren, teaching them old fashioned food preservation methods in a fun and completely stress free way. From a taste perspective, dessert lovers who appreciate rich dark chocolate will find that this syrup elevates plain vanilla ice cream, hot espresso drinks, fluffy pancakes, and fresh strawberries to gourmet levels. From a fitness and health angle, preparing your syrup at home allows you to manage your dietary intake far better than buying processed store brands. Pure cocoa powder contains powerful natural antioxidants called polyphenols, and because this sauce is naturally dairy free, fat free, and free from artificial oils, you can enjoy a sensible portion without worrying about hidden artificial ingredients.
Stepping into the art of home canning can feel intimidating for beginners, but liquid syrup canning is one of the easiest ways to start your food preservation journey. Having a row of shining glass jars neatly stored in your kitchen cupboard brings a deep feeling of self reliance and domestic accomplishment. You will never have to run to the grocery store at the last minute just to buy dessert syrup for a party or a family morning breakfast again. Homemade jarred syrup also makes an incredible, thoughtful gift for neighbors, teachers, friends, and family members during holiday seasons or special occasions. Wrapping a ribbon around a homemade jar of dark chocolate syrup shows care and effort that money simply cannot buy in a store. As you master this simple three ingredient process, you will gain confidence in your kitchen abilities and open the door to preserving many other delicious sauces, jams, and fruit liquids for your home pantry.
Ingredients You Will Need
To make a large batch of this delicious chocolate syrup for canning, you only need three clean pantry staples. Here is the exact list of ingredients along with their quantities and units:
- 1.5 cups (150 grams) Unsweetened Cocoa Powder
- 3 cups (600 grams) White Granulated Sugar or Pure Cane Sugar
- 2.5 cups (600 milliliters) Clean Water
Detailed Ingredient Breakdown
- Unsweetened Cocoa Powder: You can use standard natural unsweetened cocoa powder or Dutch processed cocoa powder. Natural cocoa powder gives a bright, classic chocolate flavor with a mild fruity tartness. Dutch processed cocoa powder has been treated to lower its acidity, resulting in a deeper dark color and a smoother, mellow chocolate taste. Make sure the cocoa powder you buy contains 100 percent pure cocoa without added sugars or milk powders.
- White Granulated Sugar: Granulated sugar acts as both a sweetener and a natural preservative in this canning recipe. Sugar binds with water molecules, which helps extend the shelf life of the syrup and gives it a glossy appearance. You can use pure cane sugar or beet sugar. Do not substitute liquid sweeteners like honey or maple syrup if you plan on long term pantry storage, as they change the water balance and viscosity of the sauce.
- Clean Water: Water serves as the liquid base that dissolves the sugar and hydrates the cocoa powder particles. Using filtered water or distilled water is recommended because tap water with high mineral content can sometimes affect the clarity and smooth texture of the finished syrup.
Step by Step Method
Making and canning chocolate syrup at home is a simple process when you break it down into easy, manageable steps. Follow these clear instructions carefully to achieve perfect results every single time.
Step 1: Equipment Preparation
Before you start cooking, gather all your equipment so your workspace is clean and organized. You will need:
- A large heavy bottom saucepan or soup pot
- A sturdy silicone spatula or wire balloon whisk
- 4 half pint (8 ounce) glass canning jars with matching lids and rings
- A large water bath canning pot with a bottom rack
- A wide mouth canning funnel
- A clean ladle
- A wet cloth or paper towel for wiping jar rims
- Jar lifting tongs
Step 2: Wash and Sterilize the Jars
Wash your glass canning jars, metal lids, and screw rings in warm soapy water. Rinse them thoroughly with clean water. Place the glass jars inside your large canning kettle filled with hot water and bring it to a gentle simmer. Let the jars stay in the hot water for at least 10 minutes to sterilize them completely. Keep the jars hot until you are ready to fill them. Keeping jars warm prevents the glass from cracking when hot syrup is poured inside.
Step 3: Mix the Dry Ingredients
Place your heavy bottom saucepan on the stove top while it is still cool. Pour in the 1.5 cups of unsweetened cocoa powder and 3 cups of granulated sugar. Use a dry wire whisk to mix the cocoa powder and sugar together for about 1 minute. Mixing the dry cocoa with the sugar granules before adding liquid is a secret kitchen trick that breaks up any cocoa lumps and ensures a silky smooth syrup later on.
Step 4: Add Water and Heat
Slowly pour the 2.5 cups of clean water into the saucepan with the sugar and cocoa mixture while whisking continuously. Continue whisking until the cocoa and sugar are fully dissolved into the water, forming a dark liquid base. Turn the heat on your burner to medium heat. Stir the pan continuously with your spatula or whisk, making sure to scrape the bottom and corners of the pot so the sugar does not burn.
Step 5: Boil the Syrup
Bring the mixture to a rolling boil while stirring regularly. Once the liquid reaches a full boil with active bubbles popping across the surface, reduce the heat slightly to medium low. Let the syrup simmer gently for 3 minutes to 5 minutes. As it boils, the liquid will transform into a smooth, glossy dark chocolate syrup. Do not boil it for too long, as excess evaporation will make the syrup overly thick like fudge, making it hard to pour later.
Step 6: Fill the Hot Canning Jars
Carefully remove your hot glass jars from the hot water bath using jar lifting tongs. Pour out any excess water inside the jars onto a clean towel. Place the wide mouth canning funnel over the top of the first jar. Use your ladle to scoop the hot chocolate syrup out of the saucepan and pour it into the jar. Leave exactly one half inch of headspace at the top of the jar. Headspace is the empty room between the top of the syrup and the rim of the jar, which allows room for expansion during processing.
Step 7: Clean Rims and Apply Lids
Take a clean paper towel dampened with warm water and carefully wipe the rim of each filled glass jar. Any sticky sugar or cocoa residue left on the glass rim will prevent the rubber gasket on the lid from sealing properly. Place a clean metal lid flat onto the top of each jar. Screw the metal ring band over the lid until it is fingertip tight. Fingertip tight means turning the ring until you feel resistance, but do not force it too tight, because air bubbles need to escape from the jar during processing.
Step 8: Water Bath Processing
Place the filled jars upright onto the rack inside your canning pot filled with hot water. Ensure that the water level covers the tops of the jars by at least 1 inch to 2 inches of water. Put the cover on the pot and bring the water to a full rolling boil over high heat. Once the water boils vigorously, start a timer for 10 minutes. Adjust processing time for your altitude if you live more than 1000 feet above sea level by adding extra minutes as recommended in canning guidelines.
Step 9: Cool and Check Seals
When the 10 minute processing timer ends, turn off the heat and remove the pot lid. Let the jars sit undisturbed in the hot water for 5 minutes to settle. Use your jar lifter to carefully transfer the jars straight up out of the water and place them onto a wooden cutting board or a thick towel laid out on your kitchen counter. Allow the jars to cool completely at room temperature for 12 to 24 hours without moving or touching them.
As the jars cool, you will hear a satisfying popping sound, which indicates that a vacuum seal has formed. After 24 hours, test the seals by pressing down on the middle of each metal lid. If the lid stays flat and does not flex or pop up and down, your jar is safely sealed. Unsealed jars should be stored directly in the refrigerator and used within three weeks. Safely sealed jars can be stored in a cool, dark pantry for up to one year.
Why This Recipe Is Special
This 3 ingredient canned chocolate syrup recipe stands out as a true winner for any home kitchen. Here are the top reasons why this simple recipe is so special compared to commercially produced syrup options:
1. Pure and Unprocessed Ingredients
Store bought chocolate syrups are filled with ingredient labels that look like high school chemistry tests. They often contain high fructose corn syrup, potassium sorbate as a preservative, artificial flavorings,xanthan gum, and mono and diglycerides. This simple recipe relies on pure cocoa, sugar, and water. You know exactly what is going into your body and what you are feeding to your family.
2. Amazing Health Benefits of Pure Cocoa
Unsweetened cocoa powder is packed with natural plant nutrients called polyphenols and flavonoids. These powerful antioxidants help fight oxidative stress in the body, support heart health, and promote blood circulation. Cocoa also contains minerals like magnesium, iron, and zinc. Because you are combining cocoa with pure water and sugar without hydrogenated oils or milk solids, the syrup remains naturally dairy free, fat free, gluten free, and completely vegan friendly.
3. Rich Superior Flavor Profile
Commercial syrups often taste overly sweet, watery, or metallic due to plastic packaging and artificial additives. Because this recipe uses a high ratio of pure cocoa powder, the resulting syrup delivers a deep, authentic dark chocolate punch. The flavor is rich, warm, and comforting with a velvety mouthfeel that coats your tongue smoothly.
4. Fantastic Cost Savings
Buying individual bottles of name brand chocolate syrup can add up quickly over time, especially for families with young children. A single box of unsweetened cocoa powder and a bag of sugar can yield multiple batches of syrup for a fraction of the cost. Canning it in small jars allows you to preserve these savings for up to a year without worrying about spoilage.
5. Shelf Stability Without Electricity
By processing your filled jars in a hot water bath, you create a vacuum seal that keeps oxygen and bacteria out of the food. This means you do not need to take up valuable refrigerator space to store unopened bottles. You can stack your neat glass jars in a pantry, cupboard, or basement shelf until you are ready to enjoy them.
Extra Tips for Better Taste
While this base recipe uses just 3 core ingredients for perfect canning safety, you can use creative ideas to elevate your chocolate experience when serving or cooking. Here are some incredible ways to get the absolute best taste from your homemade syrup:
Optional Flavor Boosters
If you want to add an extra layer of flavor complexity, you can stir in subtle additions right after removing the hot syrup from the stove top, just before pouring into jars:
- Pure Vanilla Extract: Stir in 1 teaspoon of pure vanilla extract at the end of cooking. Vanilla softens the sharp bite of dark cocoa and gives the syrup a warm, floral sweet aroma.
- Fine Sea Salt: Add a tiny pinch of fine sea salt (about one eighth of a teaspoon). Salt balances the sugar and highlights the deep cocoa undertones.
- Instant Espresso Powder: Stir in half a teaspoon of instant coffee or espresso powder. Espresso does not make the syrup taste like coffee, but it intensifies the chocolate richness dramatically.
Achieving the Perfect Viscosity
Keep in mind that hot syrup will look thinner while it is still on the stove top than it will once it cools down inside the glass jar. The high sugar concentration thickens the liquid naturally as it reaches room temperature. If you prefer a very thick ice cream fudge sauce, simmer the liquid for 6 to 7 minutes on low heat. If you prefer a light, pourable milk mixer, stick strictly to a short 3 minute boil.
Creative Serving Ideas
Your homemade canned chocolate syrup is amazingly versatile in the kitchen. Here are some fun ways to use it:
- Classic Chocolate Milk: Whisk 2 tablespoons of syrup into 1 cup of cold milk or oat milk for an instant, smooth chocolate drink.
- Gourmet Hot Cocoa: Stir 2 tablespoons of syrup into a mug of steamed almond milk or cow milk for a quick hot cocoa without any chalky residue.
- Ice Cream Sundae Topping: Drizzle warm syrup over fresh scoops of vanilla, strawberry, or mint chocolate chip ice cream.
- Breakfast Pancake Drizzle: Pour it over warm pancakes, waffles, French toast, or bowl of oatmeal alongside fresh banana slices.
- Fruit Fondue Dip: Use it as a dip for fresh strawberries, apple slices, pineapple chunks, or marshmallows.
- Coffee Mocha Boost: Swirl 1 or 2 tablespoons into your morning hot drip coffee or iced espresso for a quick mocha drink.
Final Thoughts
Making your own canned chocolate syrup with just 3 basic ingredients is one of the most rewarding kitchen projects you can undertake. It transforms humble pantry staples like cocoa powder, sugar, and water into a rich, velvety treat that brings immediate joy to adults and children alike. By taking control of the preparation process, you eliminate unwanted artificial preservatives, high fructose corn syrup, and unnecessary chemical additives from your home pantry. Whether you are pouring this rich dark sauce over a fresh scoop of vanilla ice cream, stirring it into morning milk, or gifting a beautifully decorated jar to a neighbor, this recipe delivers pure taste and satisfaction every time. Give this effortless canning guide a try this week and experience the pure pleasure of opening a fresh jar of homemade chocolate syrup directly from your pantry shelf.
Nutrition Details
Below you will find the complete nutritional information for this three ingredient canned chocolate syrup recipe. The values are calculated based on standard unsweetened cocoa powder and white granulated sugar.
Whole Recipe Batch Nutrition Table
| Total Calories | 2800 kcal |
| Carbohydrates | 680 g |
| Dietary Fiber | 40 g |
| Total Sugars | 600 g |
| Fat | 15 g |
| Saturated Fat | 9 g |
| Protein | 18 g |
| Sodium | 20 mg |
| Potassium | 1800 mg |
Per Serving Nutrition Table
Serving Size: 2 Tablespoons (30 milliliters / 1 fluid ounce) Total Servings Per Batch: Approx 32 Servings
| Calories | 87 kcal | 4 percent |
| Total Fat | 0.5 g | 1 percent |
| Saturated Fat | 0.3 g | 1 percent |
| Trans Fat | 0 g | 0 percent |
| Cholesterol | 0 mg | 0 percent |
| Sodium | 1 mg | 0 percent |
| Total Carbohydrates | 21 g | 8 percent |
| Dietary Fiber | 1.2 g | 4 percent |
| Total Sugars | 18.7 g | 37 percent |
| Added Sugars | 18.7 g | 37 percent |
| Protein | 0.5 g | 1 percent |
| Calcium | 8 mg | 1 percent |
| Iron | 0.8 mg | 4 percent |
| Potassium | 56 mg | 1 percent |
Disclaimer
The nutritional values provided in this article are calculated estimates based on standard recipe ingredients and standard serving sizes of two tablespoons. Actual nutritional output may vary based on specific brands of cocoa powder or sugar choices used in your kitchen. This article is intended for general informational, educational, and cooking purposes only. Every person has unique dietary needs, medical conditions, and metabolic responses, so individual results and nutritional requirements may differ. Always practice proper food safety and standard home canning guidelines to prevent contamination or food spoilage. If you have specific dietary restrictions, health concerns, or medical conditions, consult with a qualified healthcare professional or certified nutritionist before making significant changes to your regular diet.