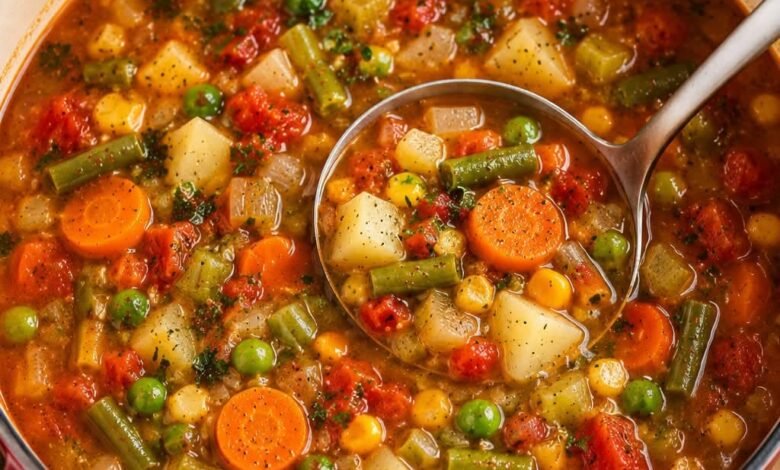
Canning homemade vegetable soup is one of the most rewarding kitchen projects you can ever start because it allows you to capture the fresh flavor of garden vegetables right inside a simple glass jar. This easy step by step process is all about bringing together fresh carrots, crisp green beans, sweet corn, rich tomatoes, delicious potatoes, and soft green peas into one warm and comforting pot. When you preserve your own vegetable soup at home, you get complete control over every single ingredient that goes into your body, which means no artificial additives, no chemical preservatives, and no extra hidden sodium that you often find in store bought canned foods. Learning this traditional food preservation skill turns fresh garden produce into a ready to eat meal that can sit on your pantry shelf for many months without losing its marvelous flavor or wholesome nutritional value.
People all across the world absolutely love this delicious homemade recipe because it brings a deep sense of comfort, immense satisfaction, and incredible convenience to their daily lives. Opening a jar of colorful homemade soup on a busy weeknight feels like opening a special gift that you prepared for your future self during a calmer moment. Families adore this meal because it offers genuine homemade goodness without requiring hours of standing near a hot stove after a very long and tiring day at work. Kids and adults alike enjoy the smooth, rich broth and the perfectly tender vegetables that maintain their individual flavors while blending into one comforting soup. It is also a very budget friendly recipe that helps households save money by using up extra seasonal produce from the local market or garden before it goes bad.
There are so many wonderful reasons and special moments to prepare and store this hearty vegetable soup in your home pantry. During cold winter evenings when the wind blows outside, having a warm jar of healthy vegetable soup ready to heat up brings an instant feeling of cozy comfort to your mind and soul. It is also an amazing choices for fitness enthusiasts and health conscious individuals because it is packed with fiber, natural vitamins, and essential minerals while remaining low in fat and total calories. Many people like to make large batches during late summer or early autumn when vegetables are fresh, cheap, and abundant, allowing them to stock up for winter emergency prep or daily meal planning. Eating a hot bowl of this fresh vegetable soup nurtures your body with clean nutrition and gives you energy when you feel tired or under the weather.
Mastering this pressure canning process builds true confidence in the kitchen and creates a wonderful tradition that you can pass down to your children and grandchildren. Preparing your own food gives you peace of mind because you know every single step of the process was handled with clean hands, warm care, and absolute love. The simple act of filling clean glass jars with vibrant orange carrots, rich red tomatoes, and soft green beans creates a beautiful visual display on your pantry shelves that makes you feel proud every time you look at it. Sharing these jarred soups as thoughtful gifts with neighbors, sick friends, or family members brings people closer together through the universal language of good food. This timeless cooking journey combines ancient kitchen wisdom with modern health benefits in a way that truly enriches your home life.
Ingredients You Will Need
To make a large batch of delicious homemade vegetable soup suitable for pressure canning, you will need the following simple ingredients:
- 8 cups of fresh chopped tomatoes with seeds and skin removed
- 4 cups of sweet yellow corn kernels fresh or frozen
- 4 cups of sliced fresh carrots cut into bite sized rounds
- 4 cups of diced potatoes washed peeled and chopped into small cubes
- 3 cups of fresh green beans trimmed and cut into small pieces
- 2 cups of sweet green peas fresh or frozen
- 2 cups of diced yellow onions finely chopped
- 2 cups of sliced celery stalks including green leafy tops
- 1 cup of chopped green bell peppers without seeds
- 4 cloves of fresh garlic minced finely
- 8 cups of water or low sodium vegetable stock
- 2 teaspoons of salt divided equally for glass jars
- 1 teaspoon of ground black pepper
- 1 teaspoon of dried oregano leaves
- 1 teaspoon of dried thyme leaves
- 2 whole bay leaves
Step by Step Method
Step 1 Prepare Your Canning Equipment
Start by carefully inspecting all your glass canning jars for any tiny chips, sharp cracks, or rough edges along the rim. Wash your quart size or pint size glass jars thoroughly using hot water and liquid dish soap, then rinse them completely with clean water. Place the clean jars inside a hot water bath or inside your pressure canner filled with warm water to keep them hot so they do not break when filled with hot soup. Place your new metal lids and screw bands in a small pan of warm water to soften the rubber sealing rings. Make sure your pressure canner is clean and that the steam vent pipe is clear of any dirt or blockage.
Step 2 Wash and Chop the Fresh Vegetables
Wash all your fresh vegetables under cold running tap water to remove any dirt or soil. Peel your potatoes and carrots, then cut them into small uniform pieces so they heat evenly inside the canner. Trim the ends of the green beans and slice them into short lengths that easily fit on a soup spoon. Dice your yellow onions, celery stalks, and green bell peppers into small bits. Peel and chop your fresh tomatoes into medium chunks. Chop your garlic cloves as small as you can to spread their flavor evenly throughout the entire pot.
Step 3 Cook the Soup Base
Place a large stockpot on your stove over medium heat and add two cups of water or vegetable broth. Add the chopped onions, celery stalks, green bell peppers, and garlic to the warm pot and cook for about five minutes until they soften slightly. Add the chopped tomatoes, sliced carrots, cut green beans, sweet corn, green peas, and diced potatoes into the stockpot. Pour in the remaining water or low sodium vegetable broth along with black pepper, dried oregano, dried thyme, and bay leaves. Bring the entire mixture to a gentle rolling boil, then lower the heat and simmer for just ten minutes so the vegetables stay firm.
Step 4 Fill the Hot Canning Jars
Remove the bay leaves from your warm soup pot using a clean spoon. Using a jar lifter, carefully remove one hot jar at a time from your warm water. Place a clean canning funnel on top of the jar and use a wide ladle to scoop the hot soup into the jar, ensuring a balanced mix of vegetables and hot liquid in every container. Leave exactly one inch of space at the top of the jar, which is known as headspace, to allow the soup to expand safely during heating. Add one half teaspoon of salt to each pint jar or one full teaspoon of salt to each quart jar if desired for added flavor.
Step 5 Remove Air Bubbles and Seal Jars
Insert a clean plastic bubble remover tool or a simple wooden utensil into the side of the filled jar and gently move it up and down to release trapped air bubbles. Recheck the headspace and add a tiny bit more liquid if needed to keep the one inch gap accurate. Take a clean paper towel dampened with hot water and wipe the top glass rim of each jar completely clean to remove any food bits or grease that could ruin the seal. Place a warm metal lid flat on top of the jar rim, then screw the metal band down gently until it feels fingertip tight.
Step 6 Process the Soup in a Pressure Canner
Place your rack in the bottom of your pressure canner and pour in three quarts of hot water or follow your specific canner manual directions. Use your jar lifter to place the filled soup jars carefully into the canner without letting them touch each other or the sides of the pot. Lock the canner lid securely in place according to the manufacturer manual and leave the vent pipe open. Turn the heat to high until steam starts flowing steadily out of the vent pipe, then let the steam vent continuously for ten full minutes to remove all air from inside the vessel.
Step 7 Apply Pressure and Monitor Time
After venting steam for ten minutes, place your weighted gauge or dial gauge mechanism over the vent pipe. Allow the pressure inside the canner to rise to ten pounds of pressure for standard altitudes or adjust higher if you live high above sea level. Once the proper pressure level is reached, start your timer immediately. Process pint jars for sixty minutes or process quart jars for seventy five minutes while watching the pressure gauge constantly to make sure the heat remains consistent throughout the entire cooking duration.
Step 8 Cool Down the Canner Safely
When the required processing time is finished, turn off the heat source completely and leave the canner untouched on the stove burner. Allow the pressure canner to cool down slowly on its own until the internal pressure drops all the way back down to zero naturally. Do not try to force the canner to cool down quickly by running cold water over it or lifting the weight early because sudden temperature changes can crack the glass jars or cause liquid to burst out of them. Once the pressure gauge reaches zero, carefully remove the weight, wait five minutes, then unlock and open the lid facing away from your face to avoid hot steam.
Step 9 Inspect Seals and Store Proper Jars
Use your jar lifter to remove the hot soup jars from the canner and set them vertically on a soft clean towel placed on your kitchen counter. Leave space between the jars so air can circulate freely around them and let them rest undisturbed for twelve to twenty four hours. As the jars cool down, you will hear a joyful popping sound which signals that the vacuum seal has worked successfully. After twenty four hours, press down on the center of each lid to confirm it is firm and flat without any flex. Wipe your jars clean, remove the outer metal bands, label each jar with the contents and date, and store them in a cool dark pantry.
Why This Recipe Is Special
This homemade canned vegetable soup recipe is special because it combines wholesome nutrition, amazing taste, and complete peace of mind in every single jar. Unlike industrial soup products that rely heavily on artificial flavorings, high amounts of sodium, and synthetic thickeners, this recipe uses only simple whole foods that you choose yourself. The process of pressure canning seals in the rich natural colors, delicate sweet juices, and vital vitamins of fresh vegetables at their peak moment of ripeness. It provides your body with a broad variety of dietary fiber, natural antioxidants, and essential minerals that promote smooth digestion, support heart wellness, and boost your immune system during every season of the year.
Another fantastic aspect of this recipe is its incredible versatility and adaptability to your personal family preferences. You can easily switch around vegetable choices depending on what is growing in your garden or what is currently on sale at your local grocery store. It is naturally gluten free, dairy free, vegetarian, and vegan friendly, making it a safe and delicious option for serving guests with diverse dietary requirements. The flavor actually improves over time as the herbs, vegetables, and broth blend together inside the sealed glass jar during storage. Having this meal ready on your shelf saves you time, cuts down on food waste, and cuts out unnecessary plastic or metal waste from commercial food packaging.
Extra Tips for Better Taste
To elevate the overall taste profile of your canned vegetable soup, consider these simple and creative kitchen tips:
- Use high quality homemade stock made from slow cooked onions, carrots, and herbs instead of plain tap water to build a richer base layer of flavor.
- Roast your root vegetables like carrots and potatoes in a hot oven for fifteen minutes before simmer processing to create a subtle caramelized sweetness.
- Add fresh leafy herbs like chopped parsley, fresh basil, or delicate bay leaves during the initial boiling phase for an elevated aromatic experience.
- Stir in a small squeeze of fresh lemon juice or a tiny splash of apple cider vinegar right when serving to brighten all the rich vegetable flavors.
- Do not add pasta, rice, flour, milk, butter, or cornstarch before canning because those dense ingredients interfere with safe heat distribution inside the pressure vessel.
- Always cook your grains or noodles separately in a different pot and stir them into your warm soup right before serving it at your table.
Final Thoughts
Canning your own homemade vegetable soup is a wonderful way to take control of your diet while filling your pantry with wholesome convenience. The simple process brings peace of mind knowing that wholesome, delicious food is always waiting for your family whenever hunger strikes. Whether you want to save money, reduce kitchen waste, or simply enjoy real food made without harsh chemicals, this easy recipe is a true winner. Give this preservation method a try, follow the safe steps carefully, and enjoy the wonderful comfort of hot, homemade vegetable soup all year long.
Nutrition Details
Here is the estimated nutritional breakdown for one single serving cup of this healthy vegetable soup recipe:
| Nutrient | Amount Per Serving |
| Serving Size | 1 cup |
| Calories | 95 kcal |
| Total Fat | 0.5 grams |
| Saturated Fat | 0.1 grams |
| Trans Fat | 0 grams |
| Cholesterol | 0 milligrams |
| Sodium | 320 milligrams |
| Total Carbohydrates | 21 grams |
| Dietary Fiber | 4.5 grams |
| Sugars | 5 grams |
| Protein | 3.5 grams |
| Vitamin A | 85 percent daily value |
| Vitamin C | 35 percent daily value |
| Calcium | 40 milligrams |
| Iron | 1.2 milligrams |
Disclaimer
This article is provided strictly for educational and informational purposes only. Everyone’s body, health conditions, and dietary requirements are unique, meaning individual results and nutritional benefits can vary from person to person. When preserving food at home, always follow current USDA pressure canning safety guidelines carefully to prevent foodborne illness like botulism. If you have specific medical conditions, food allergies, or special dietary concerns, please consult with a qualified doctor or certified nutritionist before changing your meal routine.