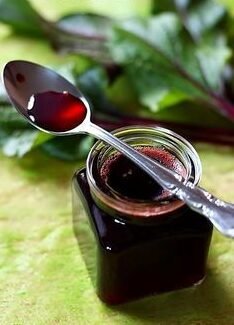
Homemade beetroot syrup is a rich, colorful, and sweet liquid sweetener made directly from fresh red garden beets, clear pure water, granulated white sugar, and a splash of fresh lemon juice. Canning this beetroot syrup allows you to capture the vibrant earthy goodness of fresh root vegetables and save it for many months inside sealed glass jars without needing any synthetic chemicals or artificial store bought preservatives. This deep ruby red syrup adds a delicious natural sweetness and an eye catching color to your morning pancakes, crisp hot waffles, ice cold beverages, homemade sodas, and baked dessert recipes. Learning how to transform humble fresh beet roots into a smooth syrup at home is an enjoyable cooking project that converts simple, inexpensive produce into a luxurious pantry staple. The basic preparation process involves gently cooking fresh beets to release their rich red juice, straining out the solid vegetable pieces, and boiling the clear liquid with sweet sugar until it thickens into a glossy syrup. Adding fresh squeezed lemon juice not only brightens up the rich taste profile but also balances the natural sweetness while helping with safe long term preservation. Fresh beetroot syrup serves as a wonderful natural alternative to common processed corn syrup or artificial store bought flavorings that lack real vegetable benefits and wholesome nutrition. Every single batch you craft brings a splash of bright color and unique gourmet flavor to your home kitchen, making everyday meals feel extra special and creative. When you open a sealed glass jar weeks or months later, you get to experience the exact same fresh taste and vibrant color as the day you poured it warm into the jar. This sweet red syrup represents a wonderful blend of traditional food preservation techniques and modern home cooking creativity.
People all over the world fall in love with homemade beetroot syrup because it balances subtle natural earthy notes with pure sweet comfort in every single spoonful. Unlike commercial syrup bottles found on supermarket shelves that often contain artificial food dyes and synthetic flavor enhancers, this homemade version provides genuine plant nutrients alongside a remarkably smooth texture. Home cooks adore how affordable fresh red beets are during the peak harvest season, which makes this recipe a budget friendly project for filling pantry shelves with colorful, nutritious jars. Beginners especially love this recipe because it does not require complicated machinery or an advanced culinary background to achieve great success on your home stove top. The simple combination of boiling, straining, and simmering makes the whole cooking process approachable for anyone who wants to learn the fundamental basics of vegetable and fruit syrup preservation. Children and adults alike get enthusiastic when they see the magnificent magenta color that instantly transforms plain white milk, simple lemonade, or basic vanilla ice cream into an exciting party treat. The lovely natural color makes it a favorite choice for creative home bakers who want a natural red coloring for cake batters, cookie frosting, or sweet dessert glazes. Sharing a bottle of this bright red syrup with family members turns regular weekend breakfasts into memorable occasions filled with fun conversations and tasty discoveries. Once people taste the smooth, clean flavor of real beet syrup, they frequently prefer it over commercial berry or maple syrups for their daily meals and snacks. The pure taste of homemade preservation simply cannot be matched by factory made alternatives full of artificial additives.
You might choose to make this comforting syrup when your vegetable garden produces an abundant harvest of fresh beets and you need a creative way to preserve them before they spoil. For fitness enthusiasts and active individuals, beetroot syrup serves as a natural energy helper packed with natural plant compounds that support healthy stamina and physical circulation during daily workouts. Athletes often enjoy adding a spoonful of this dark red syrup to their morning pre workout smoothies or water bottles for a gentle, natural nutritional boost before exercising. Emotionally, spending time in a warm kitchen while watching the deep red beet juice simmer gently on the stove brings a grounded feeling of traditional home cooking pride. The cozy atmosphere created by simmering sweet root vegetables fills your entire house with an inviting, sweet aroma that feels especially comforting during cool autumn or winter days. The taste profile is wonderfully distinct, offering a rich caramel like sweetness rounded out by subtle cozy earthy undertones that pair brilliantly with tangy Greek yogurt or warm herbal tea. Cooking a fresh batch during the autumn harvest season provides a deeply satisfying sense of self reliance as you create long lasting preserves directly from raw farm ingredients. These colorful glass jars also make thoughtful handmade gifts for friends, family members, and neighbors who appreciate unique homemade food creations made with care. Giving a jar of deep red syrup wrapped with a simple ribbon brings real warmth and joy to any special family gathering or holiday meal table. Whether you make it for health reasons, seasonal celebrations, or unique kitchen flavor, this syrup always delivers pure joy.
Preparing your own canned syrup gives you complete, total control over every single ingredient, ensuring that your final product remains pure and wholesome for your whole family. You never have to worry about hidden high fructose corn syrup, synthetic chemicals, or unnatural stabilizers when you create sweet syrups in your own kitchen space. This comprehensive guide walks you through every part of the process in clear steps so that even total canning beginners can feel completely confident throughout the entire project. By extracting the vibrant beet juice, boiling it down with sugar, and filling sterilized glass jars, you secure a long shelf life for your sweet red creation. Having several jars stored neatly in your dark pantry means you will always have a quick flavor enhancer ready to elevate breakfasts, drinks, and evening desserts. The process of heat processing the filled jars in a hot water bath creates a tight vacuum seal that locks in freshness and protects the syrup from spoilage over time. Learning this technique helps build essential home preservation skills that can be used later for making other fruit syrups, jams, jellies, and sauces. Every step of this recipe is designed to be easy to follow, highly rewarding, and fun, allowing you to enjoy the preserving process without feeling overwhelmed. Once you taste your first batch of warm beet syrup poured over fresh pancakes, you will want to make this preserver favorite a regular tradition in your home every year. Let us explore everything you need to create your very own batch of brilliant red beet syrup today.
Ingredients You Will Need
Creating high quality beetroot syrup requires simple, fresh, and wholesome ingredients that work together to balance flavor, color, and natural preservation. You do not need any artificial additives or hard to find chemical compounds to make a wonderful jar of syrup. Here is the full list of everything you need for this recipe:
- 4 pounds fresh red beetroot (choose firm, smooth beets with dark red skin and vibrant color)
- 4 cups granulated white sugar (pure cane sugar is ideal for achieving a clear syrup)
- 1/2 cup fresh squeezed lemon juice (strained to remove seeds and pulp, about 2 large lemons)
- 6 cups clean filtered water (used for cooking the beets and extracting their juice)
- 1/2 teaspoon citric acid powder (optional, adds extra tartness and supports safe pH levels)
- 1 whole cinnamon stick (optional, adds a gentle spice note to the sweet syrup)
- 1 piece fresh ginger root (optional, about 1 inch long, peeled and thinly sliced for extra zest)
To ensure your canning project runs smoothly from start to finish, you should also gather your essential kitchen equipment before you begin cooking:
- 4 pint sized (16 ounce) or 8 half pint (8 ounce) glass canning jars with matching lids and screw bands
- 1 large water bath canner pot with an interior wire rack (or a deep stockpot with a rack placed at the bottom)
- 1 heavy bottomed stainless steel or enamel pot (for boiling the beet juice and sugar syrup)
- 1 fine mesh strainer lined with a double layer of clean cheesecloth (for straining out vegetable pulp)
- 1 canning funnel with a wide opening (for pouring hot syrup into jars without messy spills)
- 1 jar lifter tongs (specially designed tool for moving hot glass jars safely)
- 1 bubble remover tool or a clean plastic spatula (for releasing trapped air inside filled jars)
- Clean cotton kitchen towels (for placing hot jars on counter tops to prevent thermal shock)
- Sharp chef knife and sturdy cutting board (for trimming and chopping the fresh beets)
Using fresh beets picked at peak ripeness will yield the best color and flavor. Avoid using beets that feel soft, wrinkled, or dry, as they contain less juice and may impart a slightly bitter taste. The lemon juice is crucial not only for taste but also for safety, as its natural acidity helps create an environment where canned goods remain fresh for long term storage.
Step by Step Method
Follow these easy steps to make and preserve your homemade beetroot syrup safely at home. Every phase of this process is explained in simple language so that even first time preservers can achieve perfect results.
Step 1: Cleaning and Preparing Your Fresh Beetroots
Start by washing your fresh red beets thoroughly under cold running tap water. Beets grow underground, so they often carry loose soil and dirt in their outer skin grooves. Use a soft vegetable brush to gently scrub the skin clean without tearing it excessively.
Leave about 1 inch of the green stem attached at the top and keep the tap root intact at the bottom during the initial wash. Leaving these ends intact prevents excessive bleeding of the rich red juice while the beets undergo their initial boiling phase.
Once the beets are completely clean, place them on your cutting board. Use a sharp knife to cut large beets into uniform quarters or halves. If you have small baby beets, you can leave them whole. Keeping the pieces relatively equal in size ensures that they cook evenly during the juice extraction stage.
Step 2: Boiling the Beets to Extract Deep Red Juice
Transfer all your prepared beet pieces into a large heavy bottomed stainless steel pot. Pour in 6 cups of clean filtered water, ensuring that the water completely covers all the beet pieces inside the pot.
Place the pot over medium high heat and bring the water to a full rolling boil. As soon as the water reaches a boil, lower the heat setting to medium low, place a lid loosely on the pot, and let the beets simmer gently.
Allow the beets to cook for about 45 to 60 minutes. You will know they are ready when a fork slides easily into the center of the largest beet piece. During this cooking time, the water will transform into a dark, intense ruby red liquid packed with natural flavor and plant nutrients.
Step 3: Straining the Liquid for Pure Clarity
Carefully remove the pot from the stove heat. Set up a fine mesh strainer over a large heat resistant bowl or a second large stainless pot. Line the fine mesh strainer with two layers of clean, damp cheesecloth.
Using a slotted spoon or tongs, remove the large beet pieces from the pot first. You can set these cooked beets aside in a bowl to peel, slice, and use in salads, side dishes, or pickled beet recipes later so nothing goes to waste.
Slowly pour the hot liquid from the pot through the cheesecloth lined strainer. Allow the liquid to drip through naturally into the bowl below. Do not press or squeeze the beet solids hard against the strainer, as forcing the soft pulp through will make your final syrup cloudy instead of clear and glossy.
Once all the liquid has drained through, measure your extracted beet juice. You should have roughly 4 cups of deep red juice. If you have slightly less, add a small splash of hot water to reach the 4 cup mark.
Step 4: Simmering Juice and Sugar into Rich Syrup
Pour your measured 4 cups of clear beet juice back into a clean, heavy bottomed pot. Add 4 cups of granulated white sugar, 1/2 cup of fresh squeezed lemon juice, and the optional citric acid powder if you choose to use it.
If you desire extra warm flavor notes, add the optional cinnamon stick or sliced ginger root to the pot at this stage. Place the pot on the stove top over medium heat.
Stir the mixture continuously using a wooden spoon or heat resistant spatula until all the sugar crystals completely dissolve into the liquid. Once dissolved, increase the heat to bring the syrup to a steady, bubbling boil.
Reduce the heat slightly to maintain a gentle, continuous simmer without boiling over. Let the syrup simmer uncovered for about 20 to 30 minutes, stirring occasionally. Watch the syrup closely as it thickens. It is ready when it coats the back of a metal spoon smoothly and reaches a shiny, translucent appearance. If you added cinnamon or ginger, remove those solid pieces with a slotted spoon now.
Step 5: Preparing Your Canning Jars and Lids
While your syrup is simmering on the stove, prepare your canning equipment. Inspect your glass mason jars carefully for any cracks, chips, or rough edges around the rim that could prevent a tight seal.
Wash the jars, flat lids, and metal screw bands thoroughly in warm soapy water, then rinse them completely with clean warm water.
Place your canning rack inside your large water bath canner pot and set your clean glass jars onto the rack. Fill the pot with warm water until the jars are covered by a few inches. Heat the pot over medium heat until the water is hot and simmering, but not boiling. Keep the jars submerged in hot water until you are ready to fill them, as pouring hot syrup into cold glass jars can cause the glass to crack from thermal shock.
Step 6: Filling the Jars and Setting Headspace
Carefully lift one hot glass jar out of the canner pot using your jar lifter tongs, pouring out the internal water back into the pot. Set the hot jar on a clean kitchen towel laid flat on your counter.
Place your wide mouth canning funnel into the top opening of the hot jar. Use a stainless steel ladle to carefully pour the hot beetroot syrup into the jar.
Fill the jar until you leave exactly 1/4 inch of empty space at the top rim. This empty distance is called headspace, and it is essential for creating a proper vacuum seal during heat processing.
Use a clean plastic spatula or bubble remover tool to slide down the inside edges of the jar, releasing any trapped air bubbles. Recheck the headspace and add a drop more syrup if needed. Wipe the glass rim of the jar thoroughly with a clean, damp paper towel to remove any sticky syrup residue, as sticky spots can stop the rubber lid from sealing. Place a clean flat lid on top and screw the metal band down until it is finger tight.
Step 7: Water Bath Canning and Heat Processing
Repeat the filling process for all remaining hot jars until your syrup batch is fully packed. Use your jar lifter tongs to lower each filled jar straight down onto the rack inside the hot water bath canner pot.
Make sure the jars stand upright and do not touch each other. The water level in the canner pot must be at least 1 to 2 inches above the tops of all the jar lids. If necessary, pour in additional boiling water to reach this level.
Place the lid securely on your water bath canner pot and turn the heat up to high. Bring the water to a full, continuous rolling boil.
Once the water achieves a full boil, start your timer. Process pint jars or half pint jars in boiling water for exactly 10 minutes (if you live at an altitude higher than 1000 feet above sea level, add extra processing time according to standard altitude adjustment charts). Keep the pot covered and maintain a steady boil throughout the entire processing duration.
Step 8: Cooling, Checking Seals, and Pantry Storage
When the 10 minute processing time is complete, turn off the stove burner. Carefully remove the canner lid, tilting it away from your face to avoid hot steam, and let the jars rest submerged in the pot for 5 minutes to settle down.
Use your jar lifter tongs to lift each hot jar straight up out of the water without tilting them. Place the hot jars upright onto a thick cotton towel set on a counter top in a draft free area, leaving an inch of space between each jar.
Allow the jars to sit completely undisturbed for 12 to 24 hours as they cool down to room temperature. As the jars cool, you will hear a satisfying high pitched popping sound, which indicates that the vacuum seal has pulled the center of the metal lid down tight.
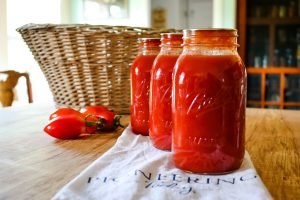
After 24 hours, test each seal by pressing down on the middle of the flat metal lid. If the lid remains firm and flat without popping up or down, the jar is successfully sealed. Wipe the jars clean, remove the screw bands, label each jar with the contents and date, and store them in a cool, dark, dry pantry. Unsealed jars should be stored in the refrigerator and used within one month.
Why This Recipe Is Special
This homemade canned beetroot syrup stands out as a unique kitchen preserve because it merges extraordinary health attributes, unmatched visual charm, and a delightfully balanced flavor profile that surprises everyone who tries it. Unlike plain refined sugar syrups, this natural syrup carries the genuine wholesome essence of fresh garden produce straight into your daily meal routine.
From a health point of view, beetroots are widely recognized for their impressive concentration of dietary nitrates. When you consume foods rich in natural nitrates, your body converts them into nitric oxide, a molecule that helps relax and widen blood vessels. This process supports smooth blood flow, aids in maintaining healthy blood pressure levels, and enhances athletic stamina during exercise. Beets are also packed with betalain compounds, which give these root vegetables their deep red pigment. Betalains function as potent antioxidants that help protect human body cells against oxidative stress while supporting natural liver detoxification pathways. Incorporating a spoon of beetroot syrup into your morning diet offers a sweet way to enjoy these valuable plant nutrients.
The taste of this syrup is another reason it holds a special place in home preservers’ hearts. It is not overly earthy like raw beet juice, nor is it flatly sweet like plain sugar water. The cooking and reduction process concentrates the natural sugars, creating warm caramel like nuances. Meanwhile, the addition of fresh lemon juice cuts through the deep root sweetness, providing a bright, refreshing citrus tang that balances the flavor spectrum beautifully. The resulting syrup is silky, smooth, and glossy, making it a luxurious topping for both sweet desserts and savory glaze creations.
From a practical perspective, canning beetroot syrup provides outstanding convenience and long shelf life. Sealed jars can sit safely in your pantry for 12 to 18 months, ready to be opened whenever you need a quick burst of color or sweetness. It serves as a 100 percent natural food dye, allowing home bakers to color cake batters, cookie frostings, and whipped creams vibrant pink or red without relying on synthetic petroleum based chemical dyes. Furthermore, beets are economical and easy to grow, making this recipe a budget friendly preservation project that yields high value, gourmet quality jars for your home.
Extra Tips for Better Taste
To take your homemade beetroot syrup to the next level of culinary excellence, you can experiment with creative flavor infusions and practical techniques. Here are several simple tips to enhance the taste and performance of your syrup batch:
- Infuse Fresh Citrus Zest: In addition to fresh lemon juice, add the finely grated zest of one whole organic orange or lime during the initial syrup simmer. Citrus oils contained in the fruit peel release aromatic floral notes that complement the earthy sweetness of beets wonderfully.
- Add Warm Cozy Spices: Enhance the warmth of your syrup by adding a small piece of star anise, two whole cloves, or a couple of cracked cardamom pods while the syrup boils down. These spices infuse a subtle chai like depth that tastes extraordinary over warm autumn waffles or mixed into hot black tea.
- Incorporate Zesty Fresh Ginger: Slicing a thumb sized piece of peeled fresh ginger root into the simmering syrup creates a lively, spicy kick. The natural warmth of ginger offsets the sweet beet juice and adds a comforting element that is especially enjoyable during cold winter months.
- Swirl in Pure Vanilla: After removing your syrup from the heat source and straining out any whole spices, stir in 1 teaspoon of pure vanilla extract or the scraped seeds of a vanilla bean pod. Vanilla rounds out the edges, giving the syrup a rich, dessert like aroma similar to red velvet cake.
- Master the Plate Test for Thickness: If you prefer a thick pancake syrup consistency, test your syrup before canning. Place a small metal saucer in your freezer for 5 minutes. Drop a spoon of hot syrup onto the cold plate and let it sit for 30 seconds. If the syrup cools into a thick, glossy gel that moves slowly when you tilt the plate, it has reached optimal thickness. If it remains thin and watery, simmer it for an extra 5 to 10 minutes before filling your jars.
- Keep It Clear: Avoid boiling the syrup at an excessively violent rolling boil for extended periods, as rapid agitation can cause micro air bubbles to become trapped, making the syrup appear cloudy. A gentle, steady simmer creates the clearest, most attractive ruby red syrup.
Final Thoughts
Preserving your own homemade beetroot syrup is a deeply rewarding culinary adventure that brings together simple ingredients, vibrant natural colors, and traditional home canning craftsmanship. By taking fresh, humble root vegetables and transforming them into a smooth, shelf stable liquid sweetener, you create a pantry treasure that elevates ordinary breakfasts, drinks, and desserts into special gourmet treats. The process is straightforward enough for complete beginners to tackle with total confidence, yet the resulting rich ruby red jars look and taste like high end artisanal creations. Whether you are preserving an abundant garden harvest, seeking natural health benefits, or looking for a creative handmade gift for loved ones, this beetroot syrup recipe is sure to become a cherished favorite in your home kitchen.
Nutrition Details
Here is the approximate nutritional breakdown for homemade beetroot syrup, calculated for individual serving sizes as well as for the entire recipe batch.
Nutritional profile per single serving (1 Tablespoon or approximately 15 milliliters):
- Calories: 50 kcal
- Total Fat: 0 grams
- Saturated Fat: 0 grams
- Trans Fat: 0 grams
- Cholesterol: 0 milligrams
- Sodium: 5 milligrams
- Total Carbohydrates: 13 grams
- Dietary Fiber: 0 grams
- Total Sugars: 13 grams (includes natural beet sugars and added cane sugar)
- Protein: 0 grams
- Potassium: 35 milligrams
- Folate: 4 percent of Recommended Daily Value
- Vitamin C: 2 percent of Recommended Daily Value
- Iron: 1 percent of Recommended Daily Value
Nutritional profile for the full recipe batch (approximately 4 cups or 64 total tablespoon servings):
- Calories: 3200 kcal
- Total Fat: 0 grams
- Sodium: 320 milligrams
- Total Carbohydrates: 832 grams
- Total Sugars: 832 grams
- Protein: 2 grams
- Potassium: 2240 milligrams
This sweet syrup provides a quick source of natural carbohydrates alongside trace amounts of beneficial minerals like potassium and essential plant nitrates. Because it contains sugar, it functions primarily as a sweetener, but it offers more micro nutrients than plain refined sugar syrup.
Disclaimer
This article and recipe are intended solely for general educational, informational, and culinary entertainment purposes. Everyone’s body is unique, and individual health responses, dietary needs, or nutritional results may change depending on metabolic factors, underlying medical conditions, or personal food sensitivities. Beetroot syrup contains concentrated sugars and natural plant nitrates, which may affect individuals with diabetes, blood pressure concerns, or specific health conditions differently. Always consult with a qualified healthcare professional, doctor, or certified registered dietitian before making significant changes to your personal diet, especially if you have pre existing health conditions or take prescription medications. Additionally, ensure you follow standard safe home canning practices and cleanliness protocols to prevent food spoilage.