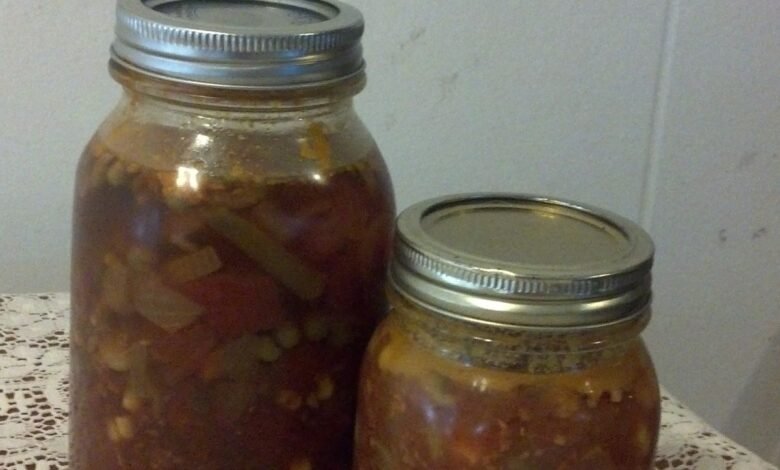
Home canned hamburger soup is one of the most comforting and satisfying meals you can ever prepare in your own kitchen. This classic recipe combines extra lean ground beef with a colorful variety of fresh farm vegetables like sweet carrots, crisp celery, tender green beans, juicy sweet corn, and hearty potatoes. Everything simmers gently in a savory tomato and beef broth that absorbs all the rich flavors of garlic, onions, and traditional garden herbs. Unlike store bought options, this homemade version lets you control every single ingredient that goes into your glass jars. The process of home preservation transforms these simple everyday food items into long lasting meals that sit proudly on your food pantry shelves. Having jarred hamburger soup ready on your shelf means you are always just a few minutes away from a hot, nourishing dinner. Each serving is packed with essential proteins, dietary fiber, vitamins, and minerals that keep your body feeling full and energized. The vibrant colors of red tomatoes, orange carrots, green beans, and yellow corn make these glass jars look like edible art in your home storage. It is a traditional style recipe that brings together simple whole foods into a bowl of pure delicious warmth for the entire family. Learning how to preserve this soup at home connects you with time honored cooking traditions while stocking your kitchen with convenient healthy food.
People absolutely love this hamburger soup recipe because it offers incredible convenience without sacrificing home cooked quality or flavor. In our modern fast paced lives, finding the time to cook a fresh and wholesome meal from scratch every single night can feel almost impossible. Opening a canned jar of this homemade soup solves that everyday challenge instantly by providing a complete meal in under ten minutes. Another reason people adore this preserved meal is the magical way the flavors develop and deepen over time while sitting sealed inside the glass jars. As the soup rests in your pantry, the savory beef juices, sweet tomatoes, herbs, and broth blend together into a rich taste that fresh soup cannot match on day one. Families love how customizable this soup is when it comes time to serve, allowing everyone to add their favorite toppings like shredded cheese, fresh herbs, or crispy crackers. It is also a massive hit with budget conscious home cooks who want to buy ground beef and fresh seasonal vegetables in bulk when prices are low. Preserving your own soup eliminates unnecessary chemical additives, artificial colorings, high fructose corn syrup, and excessive sodium found in commercial canned foods. The sheer satisfaction of popping open a jar lid and smelling that rich garlic beef aroma makes this recipe an all time favorite among home preservers.
You should make this delicious hamburger soup whenever you want to bring emotional warmth, incredible taste, and great nutritional balance into your home. Emotionally, there is nothing quite like holding a steaming bowl of rich meat and vegetable soup on a cold rainy evening or during a stressful week. The hearty broth and tender vegetables bring instant comfort, soothing your spirit and creating a cozy atmosphere in your dining room. From a taste perspective, this recipe delivers a bold savory profile with sweet undertones from ripe tomatoes and sweet corn that will delight both adults and picky children. From a fitness and health standpoint, this soup is an absolute powerhouse of essential nutrients that fit wonderfully into a clean diet plan. Lean ground beef provides clean muscle building protein while the mixture of colorful vegetables offers plenty of dietary fiber and vital antioxidants. Because you choose the exact amount of salt and fat, you can make a meal that supports your heart health and wellness goals without losing any flavor. It is also the ideal meal prep solution for fitness enthusiasts who want quick wholesome lunches after intense gym workouts or busy work shifts. Planning ahead by canning a large batch during the weekend ensures you always have clean, healthy food ready whenever hunger strikes unexpectedly.
Taking the time to preserve your own food builds a wonderful sense of self reliance and stocking your pantry brings great peace of mind. Knowing that you have healthy, delicious meals ready on your shelves gives you confidence during winter storms, power outages, or unexpected schedule shifts. The process of washing, cutting, simmering, and processing fresh ingredients is deeply therapeutic and gives you a creative break from daily digital stresses. Sharing jarred hamburger soup with family members, sick neighbors, or new parents in your community is a meaningful way to show love and care. Homemade canned gifts carry a personal touch that store bought items can never replicate, making them welcome presents during holidays or special visits. Children and young adults can also learn valuable cooking and preservation skills by helping you prepare the vegetables and fill the canning jars. This recipe serves as an ideal gateway project for beginner canners who want to learn how pressure canning works in a safe and rewarding way. The simple steps involved in preparing ground beef and fresh vegetables remove the fear of food preservation and replace it with proud culinary success. Every single jar you preserve becomes a delicious investment in your family health, monthly food budget, and everyday mealtime happiness.
Ingredients You Will Need
To create a batch of seven quart jars or fourteen pint jars of rich homemade hamburger soup, gather the following fresh and whole food ingredients:
- Lean Ground Beef: 3 pounds of extra lean ground beef, preferably 90 percent lean or higher. Using extra lean meat is crucial for home canning safety because excess fat can float to the top of jars during processing and prevent a safe rubber seal from forming on the lids.
- Yellow Onions: 2 medium size yellow onions, peeled and chopped fine. Onions build the aromatic base for the whole soup, adding natural sweetness and rich savory depth.
- Fresh Garlic: 4 large garlic cloves, peeled and minced fine. Garlic pairs naturally with ground beef and tomato sauce to give the broth an appetizing aroma.
- Fresh Carrots: 3 cups of fresh carrots, peeled and sliced into uniform bite sized coins. Carrots add vibrant natural color, subtle sweetness, and a wealth of vitamin A.
- Celery Stalks: 2 cups of fresh celery, thoroughly washed and chopped small. Celery provides a crisp herbal baseline that balances the rich meat flavors.
- Yukon Gold Potatoes: 3 cups of firm potatoes, peeled and cut into small half inch cubes. Yukon Gold or Red potatoes hold their firm shape very well during high pressure heating without becoming overly mushy.
- Green Beans: 2 cups of fresh green beans, washed, trimmed, and cut into short one inch pieces. Frozen green beans work equally well if fresh beans are not in season.
- Sweet Corn: 1.5 cups of sweet corn kernels, either fresh cut off the cob or frozen. Corn kernels add tiny pops of sweetness and pleasing texture in every bite.
- Diced Tomatoes: Two 14.5 ounce cans of diced tomatoes including all their liquid juices, or 3 cups of fresh ripe peeled tomatoes chopped fine. Tomatoes provide the traditional red color and vibrant tangy flavor.
- Tomato Sauce: 1 cup of plain tomato sauce without added oil or starches. This adds body and deep red color to the canning liquid.
- Beef Broth: 8 cups of clear low sodium beef broth or homemade beef bone broth. Broth acts as the liquid processing medium required to transfer heat safely through every jar.
- Italian Herb Seasoning: 2 tablespoons of dried Italian seasoning blend containing dried oregano, basil, thyme, and marjoram. Dried herbs are preferred over fresh herbs for canning because fresh herbs can develop a bitter taste during long heat processing.
- Canning Salt: 2 teaspoons of pure canning and pickling salt. Regular table salt contains anti caking agents and iodine that can make your soup liquid cloudy or cause natural sediment.
- Ground Black Pepper: 1 teaspoon of freshly cracked black pepper for light background warmth.
- Dried Bay Leaves: 4 whole dried bay leaves to flavor the soup while it simmers before jar loading.
- Olive Oil: 1 tablespoon of extra virgin olive oil used only for lightly cooking the onions, garlic, and beef in the initial step.
Step by Step Method
Follow these clear, beginner friendly steps to safely pressure can your homemade hamburger soup. Note that because meat and non acidic vegetables are low acid foods, a pressure canner is strictly required. Water bath canning cannot reach high enough temperatures to ensure food safety for meat products.
Step 1: Wash and Sanitize Your Equipment
Clean all your glass jars, metal ring bands, and fresh canning lids with warm soap and clean water. Rinse them thoroughly. Place your clean jars inside a hot water bath or inside your pressure canner filled with warm water to keep them hot. Keeping jars hot prevents glass cracking when hot soup is poured into them later. Set your lids and bands aside on a clean kitchen towel.
Step 2: Cook and Drain the Lean Beef
Place a large skillet or heavy soup pot on your stove over medium heat. Add one tablespoon of olive oil. Add the 3 pounds of lean ground beef into the hot skillet. Break the meat apart using a wooden spoon so it cooks into fine, small pieces. Stir continuously until the beef is fully browned and no pink color remains. Remove the skillet from the heat source. Pour the cooked beef into a strainer or colander lined with clean paper towels. Press down gently on the meat to drain away as much liquid fat as possible. Fat can ruin jar seals and cause early food spoilage, so this draining step is very important.
Step 3: Cook the Aromatic Vegetables
In a large stockpot, place the fine chopped yellow onions and minced garlic. Cook them over medium heat for about 3 to 5 minutes until the onions turn soft and translucent. Do not let the garlic burn. Add the well drained ground beef into the large stockpot with the cooked onions and garlic.
Step 4: Add Vegetables, Broth, and Spices
To the stockpot with the beef and onions, add the diced carrots, chopped celery, diced potatoes, green beans, and sweet corn. Next, pour in the diced tomatoes with their juice, the tomato sauce, and all 8 cups of low sodium beef broth. Stir in the Italian herb seasoning, pure canning salt, ground black pepper, and whole bay leaves. Stir all the ingredients together thoroughly until well mixed.
Step 5: Simmer the Soup Base
Bring the large pot of soup to a full rolling boil over high heat. Once boiling, reduce the stove heat to medium low. Cover the pot loosely with a lid and let the soup simmer gently for exactly 10 minutes. Do not fully cook the vegetables at this stage. They only need a brief simmer to get thoroughly hot. The actual pressure canning process will cook the vegetables completely inside the sealed jars. Remove and discard the whole bay leaves before moving to the next step.
Step 6: Prepare the Pressure Canner
Fill your pressure canner with 2 to 3 inches of clean warm water according to the user manual for your specific canner model. Place the internal canning rack inside the bottom of the canner. Turn the stove burner under the canner on low heat so the water inside stays warm while you fill your glass jars.
Step 7: Fill the Glass Canning Jars
Carefully remove one hot glass jar from your warm water setup using a jar lifter tool. Place a canning funnel on top of the jar opening. Use a sturdy ladle to scoop the hot hamburger soup into the jar. Make sure each jar receives a balanced mixture of ground beef, vegetables, and hot broth liquid. Fill the jar leaving exactly 1 inch of empty space at the top. This empty space is called headspace and is required for proper pressure expansion during heat processing.
Step 8: Remove Trapped Air Bubbles
Insert a plastic bubble remover tool or a simple wooden skewer down into the sides of the filled jar. Gently move the tool around the inside edge to release any hidden air bubbles trapped between the vegetables and meat. Recheck the 1 inch headspace using a measuring ruler. If the soup level drops after air bubbles escape, add a little more hot beef broth to maintain the correct 1 inch headspace.
Step 9: Clean the Rims and Apply Lids
Take a clean paper towel dampened with warm water or white vinegar. Carefully wipe the top rim of the glass jar clean of any bits of food, grease, or sticky residue. A spotless jar rim ensures a tight air tight seal with the rubber ring on the lid. Place a fresh canning lid flat on top of the clean jar rim. Screw a metal ring band over the lid until it is fingertip tight. Do not overtighten the metal band, as air needs to escape during the pressure canning process.
Step 10: Load the Canner and Lock the Lid
Use your jar lifter tool to lower the filled jar gently into the warm pressure canner. Repeat steps 7 through 9 for all remaining jars until your canner is loaded. Place the heavy pressure canner lid on top and lock it securely into position according to manufacturer instructions. Leave the steam vent pipe open without any weight placed on it yet.
Step 11: Vent Steam and Build Pressure
Turn the stove heat to medium high to bring the water inside the canner to a boil. Watch the open vent pipe until a strong, steady column of steam begins escaping continuously. Allow steam to vent freely from the pipe for 10 full minutes. This 10 minute venting period flushes out all cold air trapped inside the vessel. After 10 minutes of steam venting, place your weighted gauge on the vent pipe or close the valve on dial gauge models.
Step 12: Process under Pressure
Allow the pressure inside the canner to build up to the correct pressure for your altitude. Standard safety recommendations call for 10 pounds of pressure on a weighted gauge or 11 pounds of pressure on a dial gauge at sea level up to 1000 feet of elevation. Adjust your stove heat carefully to maintain steady pressure throughout the entire processing duration. Process pint jars for 75 minutes or quart jars for 90 minutes. If pressure drops below the required level at any point, you must bring it back up and restart the timing process completely for safety reasons.
Step 13: Depressurize and Cool Naturally
Once your processing timer finishes, turn off the stove burner completely. Leave the pressure canner undisturbed on the cool burner or off the heat. Allow the canner to cool down and depressurize completely on its own naturally. Never force cool a canner by pouring cold water over it or lifting the weight early, as this can cause hot liquid to boil out of your jars or break the glass. Natural depressurization usually takes 30 to 45 minutes. Once the pressure gauge reads zero and the safety lock drops, wait 2 additional minutes, then carefully unlock and remove the canner lid, tilting it away from your face to avoid hot steam.
Step 14: Final Inspection and Storage
Use your jar lifter to remove the hot jars from the canner carefully without tilting them. Place the hot jars upright on a thick towel or wooden cutting board resting on your kitchen counter, leaving 2 inches of space between each jar for air circulation. Let the jars sit completely undisturbed for 12 to 24 hours to cool down to room temperature. You will hear a pleasant popping sound as the lids pull down tight and seal shut. After 24 hours, test the seals by pressing down on the middle of each metal lid. Sealed lids will feel flat and will not bounce or flex. Remove the screw bands, gently wash the glass jars, write the contents and date on top of the lid with a marker, and store your canned soup in a cool, dark, dry pantry. Proper home canned hamburger soup stored correctly will remain safe and delicious for 12 to 18 months.
Why This Recipe Is Special
This canned hamburger soup recipe stands out as a true pantry gem because it combines exceptional nutritional value, unmatched convenience, and incredible homemade flavor. Ground beef is a great source of complete animal protein, high quality iron, zinc, and energizing B vitamins. Combining lean beef with an array of six distinct garden vegetables creates a balanced meal in a single jar. Carrots provide high amounts of vitamin A for healthy eyesight and immunity. Celery and green beans offer essential dietary fiber that aids digestion. Tomatoes yield lycopene, a powerful antioxidant known to support overall cardiovascular health. Sweet corn and potatoes supply natural, unrefined carbohydrates that give you sustained energy throughout the day without causing sudden blood sugar spikes.
From a culinary standpoint, the unique magic of this recipe happens inside the jar over time. While commercial canned soups often turn into mushy, overly salty liquids with processed textures, home canned hamburger soup preserves the true character of real food. The brief initial simmer step ensures the vegetables retain their structure and bite even after high pressure processing. The natural acid in the diced tomatoes cuts through the rich beef broth, creating a perfectly balanced flavor profile that appeals to young children and adults alike.
Furthermore, this recipe offers incredible economic benefits for budget focused families. Buying fresh root vegetables, ground beef, and tomato staples in bulk or during store sales cuts down your average meal cost significantly. Preserving excess summer garden produce like green beans, onions, and carrots along with lean meat ensures zero food waste in your kitchen. Having a row of these beautiful jars sitting on your pantry shelf also gives you total freedom from store bought processed canned foods, allowing you to reduce household plastic, metal, and food packaging waste while enjoying healthy, delicious meals whenever you want.
Extra Tips for Better Taste
To make your home canned hamburger soup taste even more incredible, consider these simple, creative improvement tips:
- Deglaze the Beef Skillet: After browning your ground beef and draining the excess fat, pour half a cup of warm beef broth into the hot skillet. Use a wooden spatula to scrape up all the flavorful browned meat bits stuck to the bottom of the pan. Pour this delicious deglazing liquid straight into your main soup pot for an extra punch of umami flavor.
- Select Waxy Potato Varieties: Always choose firm, waxy potato varieties such as Yukon Gold, Red Bliss, or fingerling potatoes instead of high starch russet potatoes. Waxy potatoes hold their square shape and firm texture far better during the long pressure canning process, whereas russet potatoes can break down and make your soup broth cloudy.
- Add Grains or Dairy Only Upon Reheating: Never add pasta, rice, noodles, milk, cream, or flour thickeners to your soup jars before canning. Starches interfere with safe heat penetration during pressure canning, creating a potential food safety hazard. Instead, simply cook fresh noodles, white rice, or pasta separately when heating up your soup to serve, or stir in a splash of heavy cream or sour cream right into your hot serving bowl.
- Use Fire Roasted Tomatoes: Swap standard canned diced tomatoes for fire roasted diced tomatoes. Fire roasted tomatoes add a subtle smoky sweetness to the broth that blends beautifully with garlic and ground beef.
- Skim Any Remaining Fat: Before ladling hot soup into your jars, let the main pot sit off the heat for two minutes. Use a broad spoon to skim off any leftover drops of floating oil or grease from the surface of the broth. Cleaner liquid ensures safer, longer lasting jar seals.
- Enhance Serving Toppings: When opening a jar to serve, heat the soup until piping hot and top each bowl with freshly chopped parsley, grated cheddar cheese, crisp garlic croutons, or a dash of hot sauce for an added kick of flavor.
- Store in Ideal Pantry Conditions: Keep your finished, labeled jars in a cool, dark space with temperatures between 50 and 70 degrees Fahrenheit. Storing jars away from direct sunlight and heat sources protects the vibrant natural colors, crisp textures, and optimal nutrient levels of your preserved soup for many months.
Final Thoughts
Canning homemade hamburger soup is one of the most rewarding home preservation projects you can undertake. It transforms simple, affordable ingredients into a shelf stable comforting meal that brings real convenience, rich flavor, and great nutrition straight to your dinner table. Whether you are stocking your emergency food supply, preparing for busy work weeks, or looking for a comforting meal to share with loved ones, this step by step guide empowers you to preserve food safely and with total confidence. Taking control of what your family eats starts with simple steps in your own kitchen, and popping open a fresh, home canned jar of warm hamburger soup is a wonderful reward for your efforts. Enjoy the process, take pride in your filled pantry shelves, and happy canning!
Nutrition Details
Below is the estimated nutritional breakdown for this homemade hamburger soup, calculated per serving size of one pint jar (about 2 cups of soup):
This nutritional breakdown shows that one pint serving of hamburger soup provides a well rounded, high protein, and moderate carbohydrate meal with very low fat content when using extra lean ground beef. The rich selection of vegetables contributes significantly toward your daily recommended intake of dietary fiber, vitamin A, and essential iron.
Disclaimer
This article is provided strictly for educational, informational, and home cooking guidance purposes. Everyone’s body, health status, and nutritional needs are different, so individual dietary results and calorie requirements may change based on your age, physical activity level, and personal health conditions. When preserving food at home, always follow current food safety guidelines established by official agricultural extension offices or local health authorities to ensure safe processing. If you have specific dietary restrictions, food allergies, or underlying medical conditions, consult with a qualified doctor or registered dietitian before making significant changes to your regular meal plan.